
Hardware Specifications
| Vendor/Brand | LEOX |
| Model | LXT-010H-D |
| Chipset | Realtek RTL9601D |
| Flash | SPI NOR 16MB |
| RAM | 32MB |
| System | Linux 3.18 (Luna SDK 3.3) |
| 2.5GBaseT | Yes |
| PHY Ethernet | RTL8221B |
| Optics | SC/APC |
| IP address | 192.168.100.1/24 |
| Web Gui | yes, same logins as Telnet |
| SSH | |
| Telnet | ✅ user leox, password leolabs_7 OR user adsl, password realtek |
| Serial | ✅ |
| Serial baud | 115200 |
| Serial encoding | 8-N-1 |
| Form Factor | ONT |
External Photos
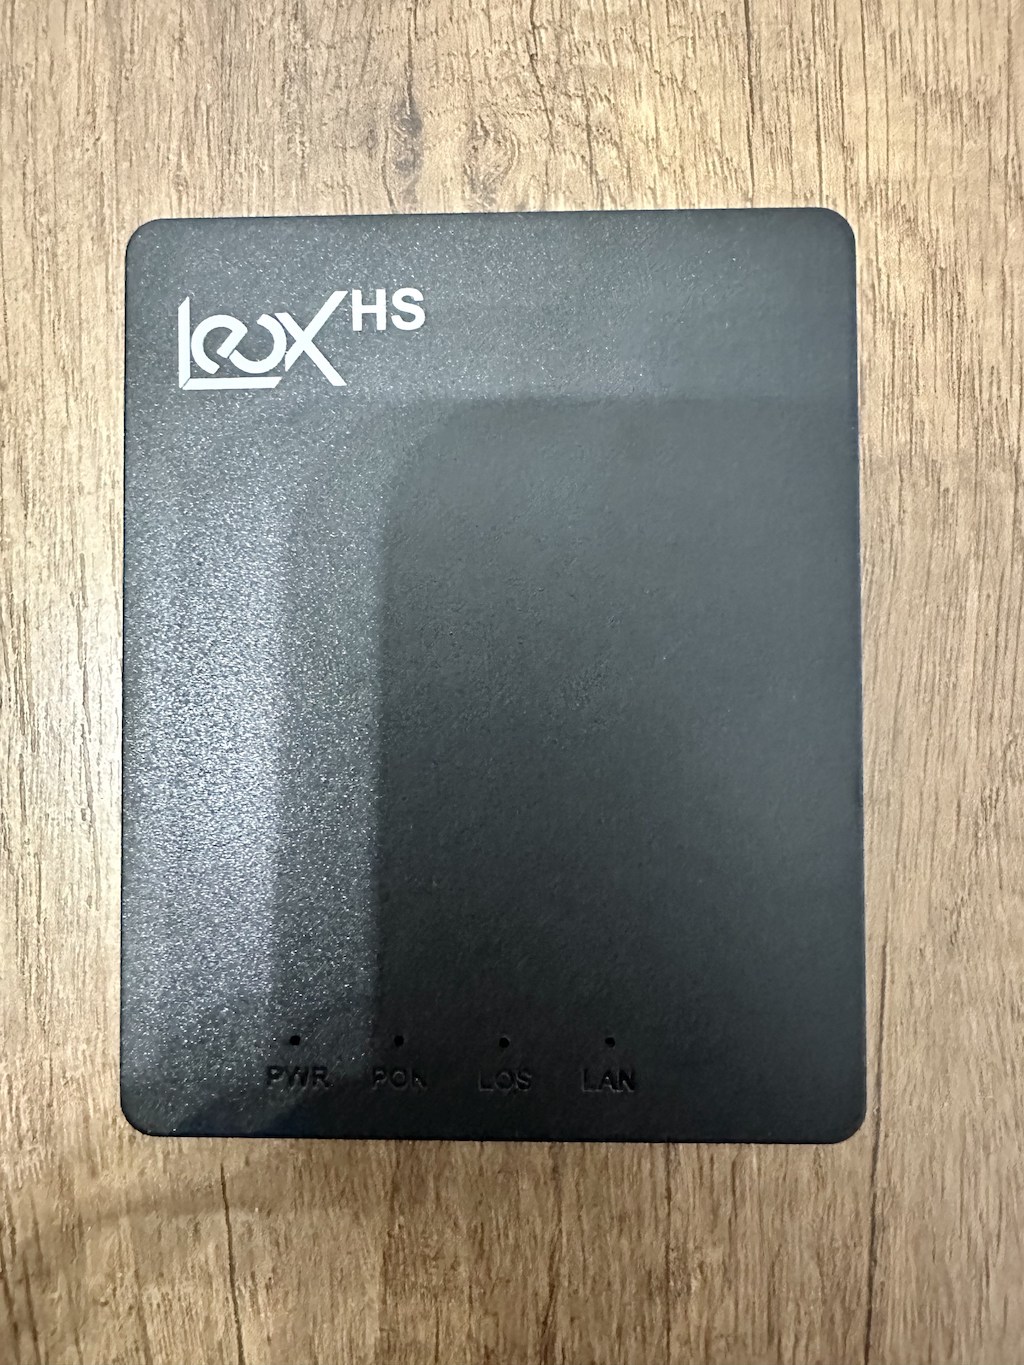
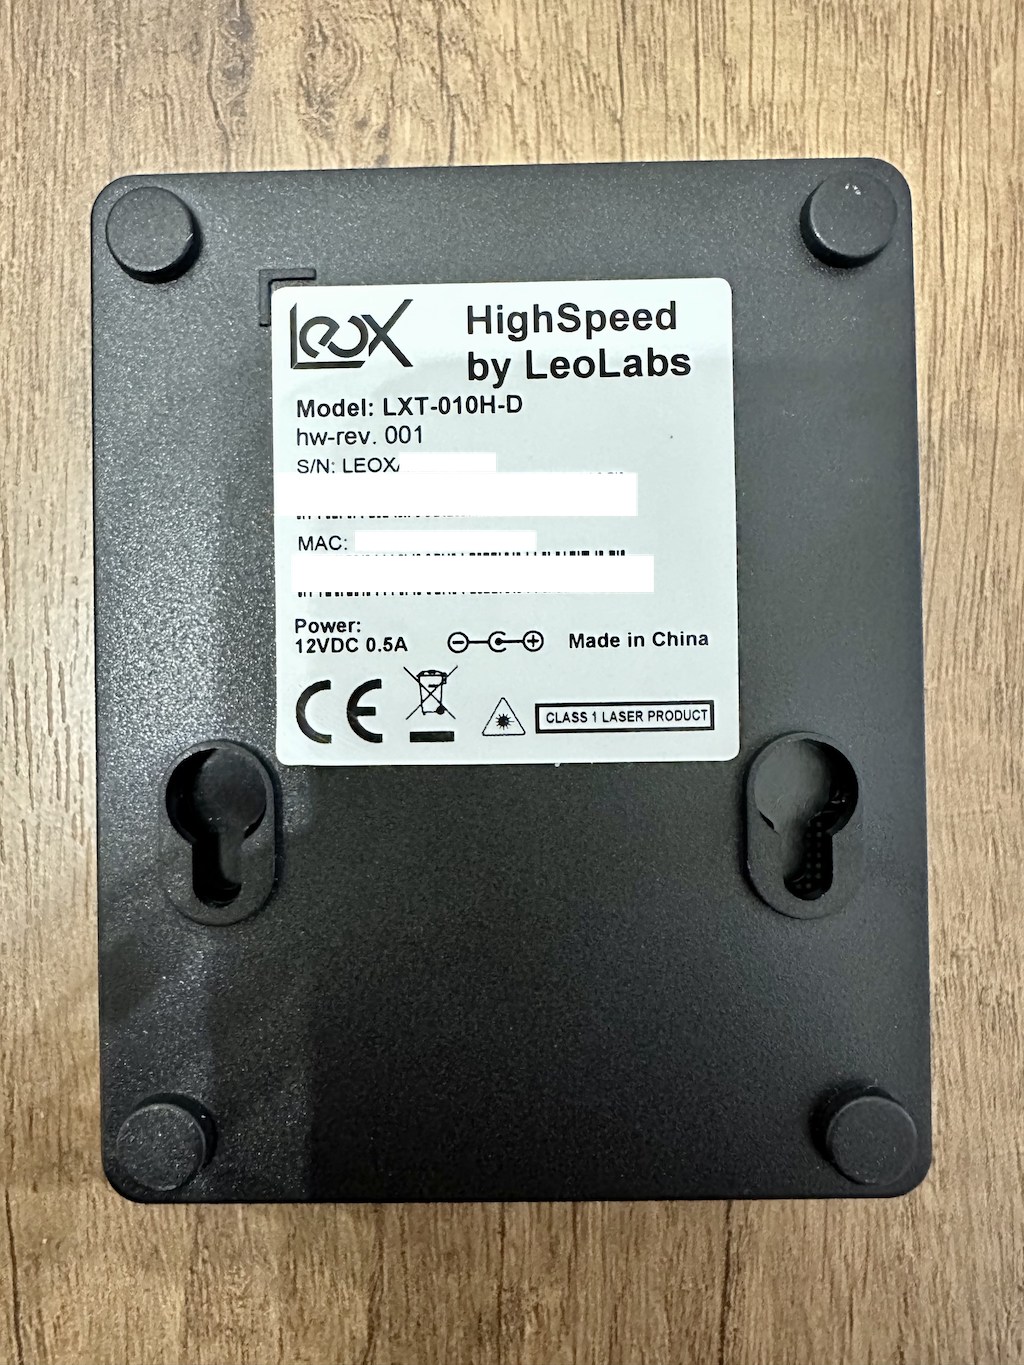
Serial
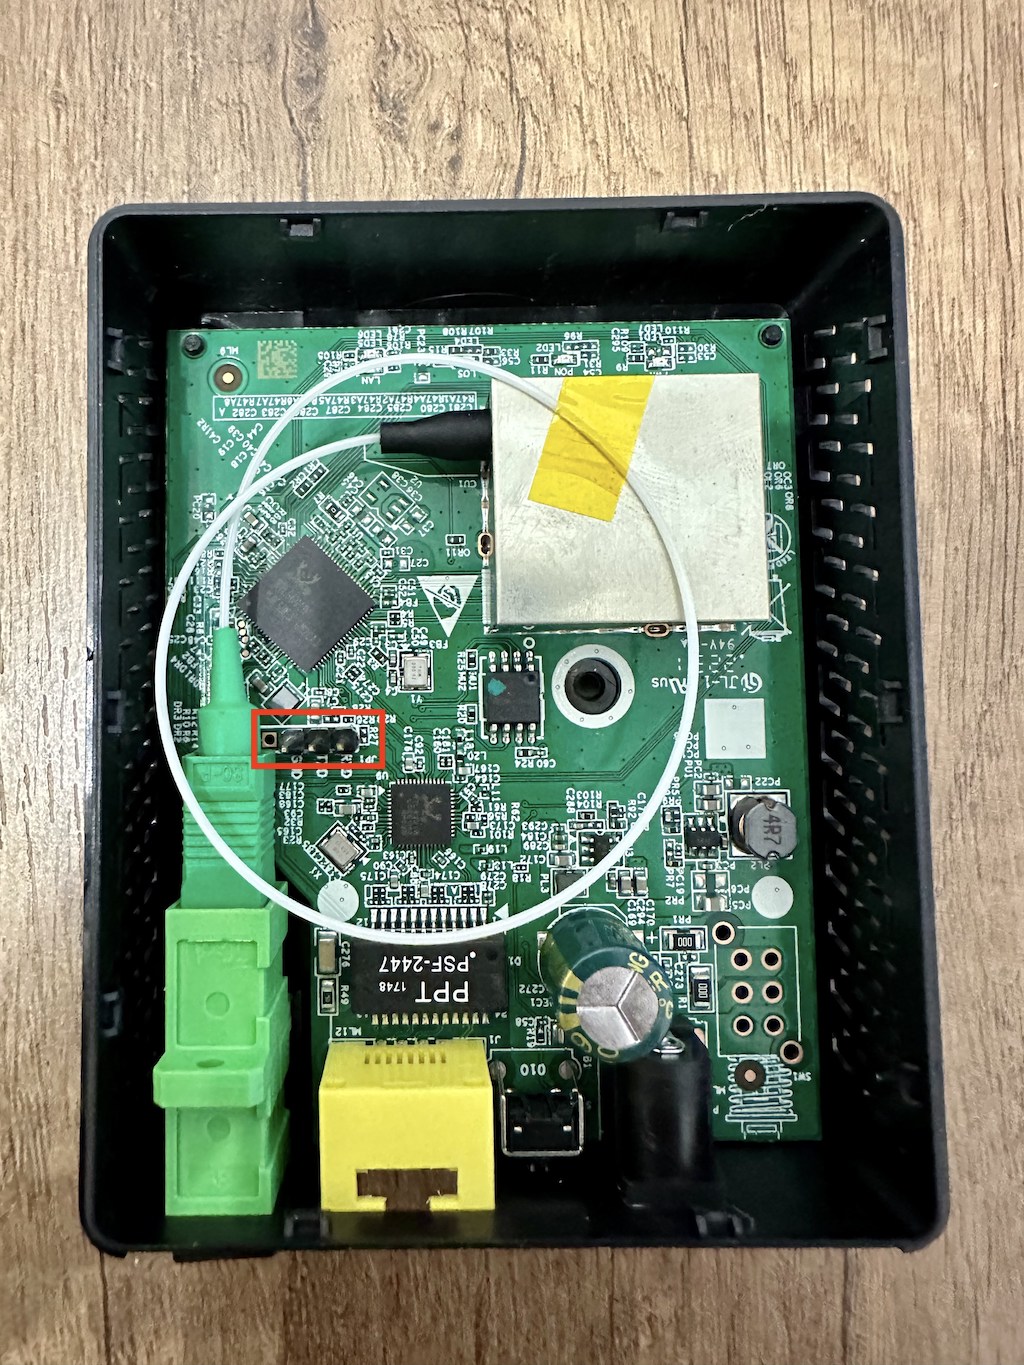
The ONT has a TTL 3.3v UART console (configured as 115200 8-N-1) that can be accessed from the top surface (see red square).
Note
Some USB TTL adapters label TX and RX pins the other way around: try to swap them if the connection doesn't work.
List of partitions
| dev | size | erasesize | name |
|---|---|---|---|
| mtd0 | 00040000 | 00001000 | "boot" |
| mtd1 | 00002000 | 00001000 | "env" |
| mtd2 | 00002000 | 00001000 | "env2" |
| mtd3 | 0003c000 | 00001000 | "config" |
| mtd4 | 00300000 | 00001000 | "k0" |
| mtd5 | 004c0000 | 00001000 | "r0" |
| mtd6 | 00300000 | 00001000 | "k1" |
| mtd7 | 004c0000 | 00001000 | "r1" |
| mtd8 | 00001000 | 00001000 | "Partition_008" |
| mtd9 | 00001000 | 00001000 | "Partition_009" |
| mtd10 | 00001000 | 00001000 | "Partition_010" |
| mtd11 | 00001000 | 00001000 | "Partition_011" |
| mtd12 | 00300000 | 00001000 | "linux" |
| mtd13 | 004c0000 | 00001000 | "rootfs" |
This ONT supports dual boot.
k0 and r0 respectively contain kernel and firmware of the first image, while k1 and r1 contain kernel and firmware of the second one.
List firmware version
- V3.3.2L6
- V3.3.2L7
- V3.3.2L8
- V3.3.2L8V (Veip firmware)
- V3.3.2L9
- V3.3.2L10 (Build date: 2025-02-24 15:50:43)
- V3.3.2L10V (Build date: 2025-02-24 14:54:15 Veip firmware)
Note
Before proceeding with any modification, make a backup of files rtl8290b.data and europa.data from /var/config folder. These files include optical calibration of your ONT's laser, if you accidentally delete or ruin them, your ONT will be unusable
Useful files and binaries
Useful files
/var/config/lastgood.xml- Contains the user portion of the configuration/tmp/omcilog- OMCI messages logs (must be enabeled, see below)
Useful binaries
/etc/scripts/flash- Used to manipulate the config files in a somewhat safe mannerxmlconfig- Used for low-level manipulation of the XML config files. Called by/etc/scripts/flashnv- Used to manipulate nvram storage, including persistent config entries vianv setenv/nv getenvomcicli- Used to interact with the running OMCI daemonomci_app- The OMCI daemondiag- Used to run low-level diagnostics commands on the stick
GPON ONU status
Getting the operational status of the ONU
diag gpon get onu-stateQuerying a particular OMCI ME
# omcicli mib get MIB_IDXGPON/OMCI settings
Getting/Setting ONU GPON Serial Number
# /etc/scripts/flash get GPON_SN
GPON_SN=TMBB00000000
# /etc/scripts/flash set GPON_SN TMBB0A1B2C3D
Getting/Setting ONU GPON PLOAM password
Info
The PLOAM password is stored in ASCII format
# /etc/scripts/flash get GPON_PLOAM_PASSWD
GPON_PLOAM_PASSWD=AAAAAAAAAA
# /etc/scripts/flash set GPON_PLOAM_PASSWD AAAAAAAAAA
Getting/Setting OMCI software version (ME 7)
Note
This needs the OMCI_OLT_MODE value to be set to 21. This will force the stick to use your own settings from the XML file, but this is a hack and causes sigsegv of /bin/checkomci.
# nv setenv sw_custom_version0 YOURFIRSTSWVER
# nv setenv sw_custom_version1 YOURSECONDSWVER
Getting/Setting OMCI hardware version (ME 256)
# /etc/scripts/flash get HW_HWVER
HW_HWVER=V2.0
# /etc/scripts/flash set HW_HWVER MYHWVERSION
Getting/Setting OMCI vendor ID (ME 256)
# /etc/scripts/flash get PON_VENDOR_ID
PON_VENDOR_ID=ZTEG
# /etc/scripts/flash set PON_VENDOR_ID HWTC
Getting/Setting OMCI equipment ID (ME 257)
# /etc/scripts/flash get GPON_ONU_MODEL
GPON_ONU_MODEL=DFP-34X-2C2
# /etc/scripts/flash set GPON_ONU_MODEL DFP-34X-XXX
Getting/Setting OMCI OLT Mode and Fake OMCI
Configure how ONT Stick handle OMCI from OLT:
# /etc/scripts/flash get OMCI_OLT_MODE
OMCI_OLT_MODE=1
# /etc/scripts/flash set OMCI_OLT_MODE 2| Value | Note | OMCI Information |
|---|---|---|
| 0 | Default Mode | Stock setting, some values cannot be changed |
| 1 | Huawei OLT Mode | Huawei MA5671a |
| 2 | ZTE OLT Mode | ZTE |
| 3 | Customized Mode | Custom Software/Hardware Version, OMCC, etc... |
| 21 | Owerflow Mode | Custom Software/Hardware Version, OMCC, etc... (this is a hack and causes sigsegv of /bin/checkomci) |
Some vendors/wholesale providers/ISPs have explicit LAN Port Number provisioning or proprietary OMCI that the stick cannot understand, this will make the stick reply OK to whatever the OLT sends it via OMCI.
0 = Disable, 1 = Enable, Default is 0
# /etc/scripts/flash get OMCI_FAKE_OK
OMCI_FAKE_OK=0
# /etc/scripts/flash set OMCI_FAKE_OK 1
Advanced settings
Setting management IP
# /etc/scripts/flash get LAN_IP_ADDR
LAN_IP_ADDR=192.168.2.1
# /etc/scripts/flash set LAN_IP_ADDR 192.168.1.1
Getting/Setting the L2 Bridge MTU
Note
Settings given via diag are not permanent after reboot
Getting/Setting the MTU of the L2 bridge
# diag switch get max-pkt-len port all
Port Speed
----------
0 1538
2 2031
# diag switch set max-pkt-len port all length 2000
Checking the currently active image
# nv getenv sw_active
sw_active=1
# nv getenv sw_version0
sw_version0=V1_7_8_210412
# nv getenv sw_version1
sw_version1=V1_7_8_210412
Booting to a different image
# nv setenv sw_commit 0|1
# reboot